Become an HMI designer

Basic
TIA Portal
S7-1500
SCL
V20
Price

999.00 

or
00
Days
:
00
Hours
:
00
Minutes
:
00
Seconds
Course leader
Tomasz Gilewski
Duration 15h
Format Online, Flash Drive
Shipping abroad Available
VAT invoice Yes
Proforma order Yes
Online delivery Immediately

Co otrzymasz po zapisaniu się na kurs wizualizacji paneli HMI ?

Kurs Projektowania HMI Panelu KPT400 pod tytułem „Zostań Projektantem HMI” przewiedzie Cię przez podstawowe zagadnienia tworzenia oprogramowania, likwidując nadmiar zawiłych pojęć i wytycznych programistycznych. Wybierając tę ofertę, dostaniesz:

90 lekcji wideo w jakości FHD (ponad 15 godzin materiałów) Systematycznie uporządkowane tematy, tworzące spójny ciąg logiczny.
Prepared project in TIA Portal for each lesson. If an error occurs during an exercise, you have the option of opening the project attached to the lesson.
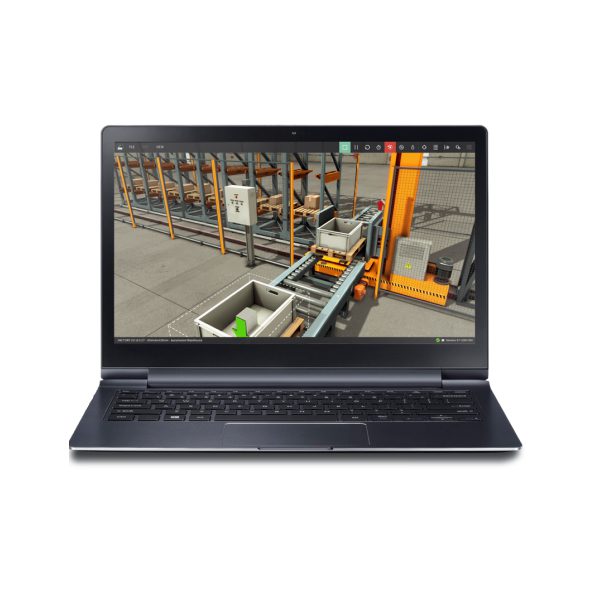
A manual on how to configure TIA Portal and Factory IO for use in the course. You will learn how to configure the software correctly, even if you are not using the actual hardware.
You will receive a certificate of completion of the course in Polish and English (after passing a test). The certificate is confirmation of your knowledge and skills. Sound mastery of the course will prepare you for successful completion of the final examination.
You gain unlimited access to the course (unlimited viewing of video lessons from any device, computer or phone). Permanent access will allow you to repeat lessons or revisit specific parts of the material.
You complete the course at your own pace without any time limits when accessing the course
You will receive free additional lessons to extend the course in the future. This will give you access to additional recordings with bonus examples to expand your knowledge

Zostań Projektantem HMI – kurs wizualizacji HMI z panelem KPT400

W naszym płatnym kursie wizualizacji HMI panelu KPT400 o nazwie 'Zostań Projektantem HMI’ odkryjesz intrygujący świat automatyzacji przemysłowej. Poznasz elementy wizualizacji, obiekty graficzne. Nasza oferta edukacyjna skupia się na praktycznych aspektach, ucząc poprzez realizację realistycznych funkcji w aplikacjach przemysłowych.

Zapewniamy dostęp do 90 lekcji wideo w jakości Full HD, co stanowi ponad 25 godzin materiałów. Tematy zostały starannie ułożone, tworząc spójny ciąg logiczny, który poprowadzi Cię przez świat projektowania wizualizacji na panele Basic z rodziny SIMATIC firmy Siemens. Każda lekcja to krok naprzód w Twoim rozwoju.

Ta oferta edukacyjna opiera się na praktyce. Skorzystamy również z programu TIA Portal oraz symulatora paneli HMI, lub jeśli masz dostęp do rzeczywistego sprzętu, możesz pracować na nim.

Po zakończeniu kursu będziesz pewnie konfigurować panele HMI basic i przygotowywać wizualizacje. Zdobędziesz wiedzę nie tylko teoretyczną, ale przede wszystkim praktyczną, która pomoże Ci stawić czoła rzeczywistym wyzwaniom w automatyce przemysłowej.

Dołącz do naszego kursu, aby poznać pełny potencjał podstawowych paneli HMI. Już teraz możesz zdobyć praktyczne umiejętności potrzebne w świecie automatyki przemysłowej.

Knowledge test:

Is this course for you? Take this test MULTIPLE choice to check it out.

Key information about the course

Unlimited access (time and number of views)

Of course! You have access without time and place restrictions

Competitive price in relation to classroom training

For many people, going away for a few days and the pressure of a group is not the ideal start. This is why many start with a video course, only to later decide on a residential course.

The course does not require physical equipment (i.e. PLC)

To szkolenie zostało stworzone w taki sposób, aby wykorzystać zasoby, jakie uczestnik ma aktualnie. Zajęcia obejmują zagadnienia z elektryki, podłączeń i schematów, a także porównują rzeczywisty panel HMI do wirtualnego. To istotne, gdyż automatycy często korzystają z symulatora HMI lub rzeczywistego panelu w zależności od sytuacji i dostępnego sprzętu

Everything is done so that you get the impression of being in a real industrial plant

Otrzymasz doświadczenie podobne do obserwowania mojej pracy na żywo, przy mnie i ze szczegółowym wyjaśnieniem. W efekcie zobaczysz rezultaty prac w postaci określonych funkcjonalności na panelu HMI.

Use of "free" software

W trakcie nauki i poznawania sprzętu oraz obiektów graficznych, pełna funkcjonalność licencji testowej (trial) w zupełności wystarczy. Przedstawię Ci, jak wykorzystać tę opcję w celu ukończenia kursu przy użyciu TIA Portal.

Dobre praktyki

Kluczowe jest, aby nasza praca była czytelna i zrozumiała, nawet kiedy po pewnym czasie wrócisz do projektu. Oprócz nauki procesów związanych z automatyką i projektowaniem wizualizacji, będę kłaść nacisk na kształtowanie u Ciebie solidnych praktyk zgodnych z zasadami obowiązującymi w świecie automatyki przemysłowej.

Self-solving tasks

Aby solidnie utrwalić zdobytą wiedzę, kluczowe są trening i ćwiczenia. W związku z tym, otrzymasz prace domowe. Rozwiązywanie zadań i problemów to najszybsza ścieżka do opanowania umiejętności.

Benefits of taking part in the course

Compatible with the latest Windows You will perform all tasks whether you are using Windows 7, Windows 8.1, Windows 10 or Windows 11.
You don't need the equipment Kurs odbywa się na symulatorze HMI, który pozwala na wizualizację i krok po kroku odzwierciedla działania prawdziwego panelu HMI. Oczywiście, jeśli masz fizyczny panel HMI, możesz go użyć do realizacji kursu
You don't need to buy software You complete all assignments in the TIA Portal, available for free download and use for 3 weeks. This is plenty of time to complete the course. If you have your own TIA Portal licence, you can also use it to complete the course.
You have an individual position The course takes place on your own PC, allowing you to do the exercises yourself and learn effectively.
Uczysz się na panelu KPT400 Często wykorzystywany w przemyśle i aplikacjach zautomatyzowanych, jest głównym tematem tego kursu
Poznajesz najważniejsze funkcjonalności HMI Kurs ten pozwala na poznanie w praktyce zagadnień umożliwiające osiągnięcie pełnej samodzielnościi w projektowaniu wizualizacji
No need to take notes You will receive all necessary materials with the course
Staggered learning Each lesson focuses on a specific topic, allowing you to learn more effectively. As a result, you learn more effectively
Video recordings Dokładnie zobaczysz, jak krok po kroku realizować różne funkcjonalności. To jakbyśmy razem pracowali - będziesz mieć dostęp do ponad 35 godzin materiału do obejrzenia.
You don't have to go anywhere You can complete tasks at any time, regardless of the hour. No local restrictions - all you need is a computer. Adapt your learning to your pace
Będziesz umiał też programować rzeczywisty panel HMI You will be given the skills to work with real equipment.
Additional tasks Dołączone są dodatkowe zadania, które pozwolą Ci samodzielnie rozwiązać stawiane wyzwania. To wspaniała okazja do zdobycia praktycznego doświadczenia.
Competitive price compared to classroom training Nasza konkurencyjna cena za ten kurs projektowania HMI to doskonała inwestycja w Twoje zawodowe umiejętności. Porównując ją z tradycyjnymi szkoleniami stacjonarnymi, zyskujesz wysoką jakość nauki w przystępnej cenie

Example lesson

Jak wygląda kurs z wizualizacji dla paneli HMI?

Po zapisaniu się na kurs, otrzymasz wiadomość e-mail zawierającą dane do logowania do naszej platformy edukacyjnej. Tam będziesz mieć dostęp do kompletnego zestawu materiałów oraz lekcji, podzielonych na klarowne sekcje zgodnie z treścią kursu. To pozwoli Ci na swobodne śledzenie kursu w tempie dostosowanym do Twoich potrzeb. Niezależnie od tego, czy korzystasz z komputera czy telefonu komórkowego, z łatwością uzyskasz dostęp do wszystkich treści. Po ukończeniu każdej lekcji, oznaczysz ją jako zakończoną, aby zawsze mieć pełny obraz swojego postępu.

Part 1
  • Module 1 - downloading and installing the TIA Portal environment
    • Lesson 1 - Registration on the Siemens website
    • Lesson 2 - Which files to download
    • Lesson 3 - Installation of the TIA Portal software
    • Lesson 4 - Installing the PLCsim simulator
  • Module 2 - Downloading and installing the virtual factory - Factory IO
    • Lesson 1 - Which files to download
    • Lesson 2 - Installation of the Factory IO tool
  • Module 3 - Licences
    • Lesson 1 - TIA Portal - Activation of a TRIAL licence
    • Lesson 2 - TIA Portal - Activating the full licence (floating)
    • Lesson 3 - Factory IO- Activation of TRIAL licences
    • Lesson 4 - Factory IO - Activating the full licence
  • Module 4 - Actual PLC
    • Lesson 1 - Electrical Engineering - Diagram
    • Lesson 2 - Preparing the PC/PG
    • Lesson 3 - Searching for PLCs on an Ethernet/PROFINET network
    • Lesson 4 - Adapting the PLC for the course
Part 2:
  • Moduł 1: Opcje ogólne
    • Lekcja 1 – Preferencje globalne dla środowiska WinCC TIA
    • Lekcja 2 – Wyświetlanie szablonu podczas redagowania ekranu
    • Lekcja 3 – Proporcje obiektów ekranowych podczas transformacji
    • Lekcja 4 – Inne ustawienia ogólne w środowisku WinCC TIA Portal
    • Lekcja 5 – Zadanie „Transformacja typu panelu”
    • Lekcja 6 – Inicjacja zmiany typu panelu
    • Lekcja 7 – Raporty z transformacji oraz kompilacji
    • Lekcja 8 – Opcje globalne dla projektu wizualizacji
    • Lekcja 9 – Języki i czcionki instalowane na panelu
  • Moduł 2: Założenie projektu
    • Lekcja 1 – Tworzenie nowego projektu
    • Lekcja 2 – Selekcja CPU – Nieokreślona
    • Lekcja 3 – Wejście w TIA Portal – początkowy ekran
    • Lekcja 4 – Pobieranie ustawień z przypisanego CPU
    • Lekcja 5 – Rozpoznanie dostępnych w sieci urządzeń
    • Lekcja 6 – Kontrola lub zmiana adresu IP odczytanego z kontrolera
    • Lekcja 7 – Zapis i import konfiguracji do PLC z podmianą adresu IP
    • Lekcja 8 – Tworzenie bloku danych
    • Lekcja 9 – Deklaracja zmiennych w bloku danych
    • Lekcja 10 – Wprowadzanie kodu
    • Lekcja 11 – Przypisywanie zmiennych
    • Lekcja 12 – Ustanowienie sieci PROFINET w widoku sieci
    • Lekcja 13 – Modyfikacja bloku programowego
    • Lekcja 14 – Inspekcja bloku programowego
    • Lekcja 15 – Testowanie aplikacji
    • Lekcja 16 – Wybór panelu operatorskiego w planie
    • Lekcja 17 – Konfiguracja adresu urządzenia w sieci PROFINET
    • Lekcja 18 – Rozbudowa edytora ekranów wizualizacji
    • Lekcja 19 – Dodawanie pola z daną procesową
    • Lekcja 20 – Ustanowienie nowego połączenia HMI
    • Lekcja 21 – Poprawne skonfigurowane połączenie HMI
    • Lekcja 22 – Wstawianie tekstu statycznego
    • Lekcja 23 – Kreacja zmiennej HMI na bazie zmiennej z PLC
    • Lekcja 24 – Kompilacja i weryfikacja w symulatorze Runtime
    • Lekcja 25 – Konieczne ustawienia S7ONLINE dla aplikacji Runtime
    • Lekcja 26 – Przygotowanie panelu do pierwszego użytku
    • Lekcja 27 – Ustawienie portu ETHERNET w panelu
    • Lekcja 28 – Przesłanie konfiguracji na panel
    • Lekcja 29 – Dodanie przycisku na ekranie
    • Lekcja 30 – Wezwanie konfiguratora sieci
    • Lekcja 31 – Zapis i odczyt projektu
  • Moduł 3: Projektowania interfejsów wizualizacyjnych
    • Lekcja 1 – Zmiana jednostki „Nieokreślony CPU” na rzeczywisty
    • Lekcja 2 – Nadzór nad blokiem DB zawierającym dane procesowe
    • Lekcja 3 – Inicjowanie nowego projektu wizualizacyjnego z pomocą kreatora
    • Lekcja 4 – Instrukcja kreatora –
    • Lekcja 5 – Modyfikacja ustawień
    • Lekcja 6 – Instrukcja kreatora –
    • Lekcja 7 – Korekcja adresów IP sterownika i panelu
    • Lekcja 8 – Wykorzystanie ekranu globalnego
    • Lekcja 9 – Implementacja szablonów ekranów wizualizacyjnych
    • Lekcja 10 – Realizacja projektu wizualizacji przy użyciu szablonu
Część 3:
  • Moduł 1 - Fundamentalne elementy ekranowe
    • Lekcja 1 – Charakterystyka ekranu
    • Lekcja 2 – Właściwości ekranu
    • Lekcja 3 – Ekrany widoczne i niewidoczne, zdarzenia
    • Lekcja 4 – Obiekty zaznaczone
    • Lekcja 5 – Uzyskanie dostępu do okna właściwości danego elementu
    • Lekcja 6 – Linia – cechy szczególne elementu
    • Lekcja 7 – Wielokąt – cechy szczególne elementu
    • Lekcja 8 – Wytwarzanie własnej grafiki do użytku w TIA Portal
  • Moduł 2 - Zmienne i pola
    • Lekcja 1 – Zmienne w HMI
    • Lekcja 2 – Konstruowanie zmiennej HMI wraz z obiektem ekranowym
    • Lekcja 3 – Konsola zmiennych HMI
    • Lekcja 4 – Tworzenie zmiennej w konsoli
    • Lekcja 5 – Atrybuty zmiennej HMI
    • Lekcja 6 – Proporcjonalne skalowanie
    • Lekcja 7 – Próba „Regulacji zmiennej o punktowym adresowaniu”
    • Lekcja 8 – Limity wartości i ich oddziaływanie
    • Lekcja 9 – Kreacja i eksploatacja wewnętrznych zmiennych
    • Lekcja 10 – Eksport i import danych do pliku .xlsx
    • Lekcja 11 – Właściwości pól ekranowych
    • Lekcja 12 – Formatowanie wartości liczbowych w polach
    • Lekcja 13 – Ramka pola, tło i styl tekstu
    • Lekcja 14 – Wskazanie przekroczenia limitów wartości
    • Lekcja 15 – Pozostałe cechy pola
  • Moduł 3 - Pomocnicze treści
    • Lekcja 1 – Statyczne przypisanie tekstu pomocniczego do przycisku ekranowego
    • Lekcja 2 – Wzywanie kontekstowych tekstów pomocniczych
    • Lekcja 3 – Opcje tworzenia tekstu pomocniczego
Część 4:
  • Moduł 1: Animacja składników ekranowych
    • Lekcja 1 – Skupienie obiektów
    • Lekcja 2 – Sterowanie barwami i pulsacją
    • Lekcja 3 – Techniki kontroli barw i pulsacji
    • Lekcja 4 – Sterowanie widzialnością elementu
    • Lekcja 5 – Manipulacja lokalizacją
    • Lekcja 6 – Zmienność w położeniu
    • Lekcja 7 – Zręczne przemieszczanie elementu
    • Lekcja 8 – Przemieszczanie w poziomie
    • Lekcja 9 – Przemieszczanie w pionie
    • Lekcja 10 – Bank symboli
    • Lekcja 11 – Korekta symboli
  • Moduł 2: - Przyciski, klawisze i przełączniki
    • Lekcja 1 – Charakterystyka przycisków, różnorodność typów
    • Lekcja 2 – Konfiguracja przycisku tekstowego
    • Lekcja 3 – Przyciski, manipulacja kolorem tekstu i tła
    • Lekcja 4 – Przyciski, regulacja atrybutów tekstu
    • Lekcja 5 – Wizualne efekty trójwymiarowych przycisków
    • Lekcja 6 – Konfiguracja szczegółowych parametrów przycisków
    • Lekcja 7 – Ustalanie ograniczeń dostępu dla przycisków
    • Lekcja 8 – Mapowanie funkcji na przyciski
    • Lekcja 9 – Konfiguracja przycisku – ukrywanie
    • Lekcja 10 – Konfiguracja graficznego przycisku
    • Lekcja 11 – Kreowanie własnych grafik
    • Lekcja 12 – Wprowadzanie grafiki z pliku
    • Lekcja 13 – Dodawanie obiektu z globalnego repozytorium
    • Lekcja 14 – Globalny ekran, szablony oraz ekrany użytkownika
    • Lekcja 15 – Klawisze funkcyjne, przydzielenie grafiki
    • Lekcja 16 – Klawisze funkcyjne, przydzielenie grafiki oraz funkcji
    • Lekcja 17 – Klawisze funkcyjne, wiązanie zdarzenia
    • Lekcja 18 – Właściwości przełącznika
    • Lekcja 19 – Parametry przełącznika
  • Moduł 3: - Listy tekstowe i graficzne
    • Lekcja 1 – Rola list tekstowych w interfejsach użytkownika
    • Lekcja 2 – Tworzenie i różnorodność list tekstowych
    • Lekcja 3 – Tworzenie obiektu listy tekstowej
    • Lekcja 4 – Wprowadzenie listy tekstowej binarnej
    • Lekcja 5 – Operacje na listach binarnych
    • Lekcja 6 – Listy tekstowe numeryczne
    • Lekcja 7 – Instrukcja „Tworzenie listy graficznej”
    • Lekcja 8 – Generowanie graficznej listy danych
    • Lekcja 9 – Kształtowanie osadzonego obiektu graficznego OLE
    • Lekcja 10 – Konfiguracja ekranowego obiektu listy graficznej
    • Lekcja 11 – Aspekty wymiarowe i kolorystyczne obiektu listy graficznej
    • Lekcja 12 – Lista dwustanowa z grafikami
    • Lekcja 13 – Opis przycisku ekranowego za pomocą listy graficznej
    • Lekcja 14 – Wykorzystanie obiektów bibliotecznych z listami graficznymi
Część 5:
  • Moduł 1 - Projekty wielojęzyczne
    • Lekcja 1 – Warianty językowe projektów
    • Lekcja 2 – Dodawanie nowego języka do projektu
    • Lekcja 3 – Języki dostępne podczas działania w trybie Runtime
    • Lekcja 4 – Selekcja fontów używanych do opisów
    • Lekcja 5 – Język interfejsu, język odniesienia
    • Lekcja 6 – Wykorzystanie języka odniesienia podczas translacji
    • Lekcja 7 – Użycie klawiatury na ekranie
    • Lekcja 8 – Skorzystanie z tablicy tekstów – praktyczny sposób na edycję opisów
    • Lekcja 9 – Eksport plików z tekstem projektu
    • Lekcja 10 – Import plików z tekstem projektu
    • Lekcja 11 – Modyfikacja języka w trybie online
    • Lekcja 12 – Zalety wynikające z implementacji różnych wersji językowych
    • Lekcja 13 – Proces tworzenia projektu wielojęzycznego
  • Moduł 2 - Komunikaty
    • Lekcja 1 – Implementacja systemu powiadamiania
    • Lekcja 2 – Kategorie komunikatów
    • Lekcja 3 – Konfiguracja kategorii komunikatów
    • Lekcja 4 – Typy alarmów
    • Lekcja 5 – Inicjowanie komunikatów
    • Lekcja 6 – Kształtowanie alarmów dyskretnych
    • Lekcja 7 – Prezentacja wartości zmiennych w treści alarmów
    • Lekcja 8 – Atuty alarmów dyskretnych
    • Lekcja 9 – Schemat potwierdzania alarmów
    • Lekcja 10 – Grupy potwierdzania komunikatów
    • Lekcja 11 – Opis pomocy związany z alarmem
    • Lekcja 12 – Przypisanie operacji do alarmów
    • Lekcja 13 – Pokazywanie alarmów w projekcie utworzonym przy pomocy kreatora
    • Lekcja 14 – Globalne konfiguracje modułu komunikatów
    • Lekcja 15 – Obiekty na globalnym ekranie skojarzone z systemem alarmowym
    • Lekcja 16 – Istotne właściwości obiektu „Wskaźnik alarmu”
    • Lekcja 17 – Kluczowe parametry obiektu „Okno alarmowe”
    • Lekcja 18 – Istotne cechy obiektu „Okno alarmowe”
    • Lekcja 19 – Główne parametry obiektu „Okno alarmowe”
    • Lekcja 20 – Spis alarmów na ekranie użytkownika: „Widok alarmów”
    • Lekcja 21 – Znaczące właściwości obiektu „Widok alarmów”
    • Lekcja 24 – Kreator alarmów analogowych
    • Lekcja 25 – Kluczowe parametry alarmu analogowego
  • Moduł 3 - Użytkownicy i hasła
    • Lekcja 1 – Funkcjonowanie systemu zabezpieczeń
    • Lekcja 2 – Grupowanie użytkowników
    • Lekcja 3 – Dane osobowe użytkowników
    • Lekcja 4 – Konfiguracja zabezpieczeń systemu
    • Lekcja 5 – Zablokowanie dostępu do elementów ekranowych
    • Lekcja 6 – Ograniczenie dostępu do klawiszy funkcjonalnych
    • Lekcja 7 – Redagowanie parametrów użytkowników w trybie Runtime
    • Lekcja 8 – Wykorzystanie funkcji bibliotecznych związanych z systemem zabezpieczeń
BONUS
  • Module 1 - TIA Portal
    • Lesson 1 - Integration of engineering software
    • Lesson 2 - Centralised engineering structure
    • Lesson 3 - Intuitive - efficient - future-oriented
    • Lesson 4 - Efficient engineering for beginners
    • Lesson 5 - Compatibility and high level of protection
    • Lesson 6 - Intuitive user interface
    • Lesson 7 - Emphasis on tasks and users
    • Lesson 8 - Task-oriented navigation
    • Lesson 9 - Attractive user interface
    • Lesson 10 - Identical layout in all editors
    • Lesson 11 - SCADA - now simplified
    • Lesson 12 - Visualising the process
    • Lesson 13 - Safety
    • Lesson 14 - Integrating safety
    • Lesson 15 - Efficient engineering for beginners
    • Lesson 16 - Devices and networks
    • Lesson 17 - A "clean" layout for an efficient configuration
    • Lesson 18 - A well-organised view of the web
    • Lesson 19 - Aggregated data
    • Lesson 20 - Easy handling of big data
    • Lesson 21 - Collaborative data management
    • Lesson 22 - High quality design
    • Lesson 23 - Programming
    • Lesson 24 - Efficient programming for fast and flexible solutions
    • Lesson 25 - Intuitive graphic programming techniques
    • Lesson 26 - Intuitive programming in a high-level language
    • Lesson 27 - Controller and HMI interaction (1/2))
    • Lesson 28 - Controller and HMI interaction (2/2)
    • Lesson 29 - Library concept
    • Lesson 30 - Cost optimisation and re-use of know-how
    • Lesson 31 - System diagnostics
    • Lesson 32 - Easy monitoring of installations and components in the program
    • Lesson 33 - Accessing the current status of the system at any time
    • Lesson 34 - Compatibility and high level of investment protection
    • Lesson 35 - Scalability
    • Lesson 36 - Comprehensive engineering for all SIMATIC S7 controllers
    • Lesson 37 - Complex engineering from panel to SCADA
    • Lesson 38 - Password protection
    • Lesson 39 - Protection against unauthorised access
15h Knowledge hours
15 Course modules
179 Satisfied students

Software and hardware used

TIA Portal software

Totally integrated automation is a development environment that combines PLC (programming), HMI(visualisation) and startdrive(drive technology).

CPU S7-1200

The new controller, which has been developed as a successor to the S7-200, is characterised by slightly weaker parameters than the S7-300 family. Several CPU versions present in the family allow selection according to project requirements.

Factory IO

Typical machine scenarios can be run in Factory IO, and the virtual factory connects to the SIM PLC simulator (or the actual PLC. Programming of the controller is possible in the programming environment (depending on the PLC family), and insight into its operation is available during the online connection

What will you be able to do after completing the course?

Zakończenie technicznej szkoły to znaczący sukces, jednak co dalej z takim osiągnięciem? Jeśli rozważałeś studia, rozważ tę opcję. Nasza oferta edukacyjna stanowi szybki skok naprzód w Twojej ścieżce zawodowej. Otrzymasz zaświadczenie, które od razu będzie przynosić korzyści. Tworzenie wizualizacji na panele HMI firmy Siemens otwiera wiele możliwości. Po ukończeniu naszego kursu będziesz miał elastyczność w zmianie branż i stanowisk – to zależy od Ciebie, w której dziedzinie chcesz się specjalizować

Process automation officer Opanuj zarządzanie tworzeniem wizualizacji w automatyce przemysłowej. Nasza oferta edukacyjna zapewni Ci zdobycie umiejętności programowania panelu HMI od podstaw, eliminując nadmiar teoretycznej wiedzy.
Projektant HMI Po ukończeniu kursu, stanie się pewnym automatykiem w obszarze programowania paneli HMI, gotowym do podejmowania wyzwań w dziedzinie automatyzacji przemysłowej. Będziesz projektować i doskonalić wizualizacje dla paneli HMI KPT400, zapewniając płynne działanie różnorodnych procesów produkcyjnych. Twoje umiejętności będą nieocenione w sektorze, gdzie projektowanie, wdrażanie i utrzymywanie paneli HMI stanowi klucz do efektywnej automatyzacji przemysłowej
Sales Engineer Nabywając umiejętności programowania paneli HMI KPT400, staniesz się przygotowanym specjalistą do roli inżyniera sprzedaży w obszarze automatyzacji przemysłowej. Posiądziesz zdolność do efektywnego doradztwa klientom w kwestii wyboru i konfiguracji paneli HMI oraz oprogramowania. Twoja wiedza umożliwi Ci trafne rozpoznawanie potrzeb klientów i sugerowanie optymalnych rozwiązań, wzmocniąc tym samym Twoją pozycję jako eksperta w dziedzinie automatyzacji przemysłowej.
Product manager Posiądziesz kompetencje, które otworzą przed Tobą możliwość objęcia stanowiska Kierownika Produktu w obszarze automatyki przemysłowej. Będziesz w stanie skutecznie kierować projektami związanymi z rozwojem produktów, a Twoja wiedza z zakresu programowania paneli HMI KPT400 pozwoli Ci lepiej zrozumieć techniczne aspekty i potrzeby klientów. Twoje zaangażowanie w proces tworzenia nowych produktów przyczyni się do sukcesu firmy na konkurencyjnym rynku automatyki przemysłowej

Po ukończeniu tego kursu projektowania wizualizacji będziesz gotowy do rozpoczęcia fascynującej kariery w automatyce przemysłowej. Od programisty PLC po inżyniera sprzedaży, od technicznego specjalisty po product managera – otwierają się przed Tobą różnorodne ścieżki zawodowe. Twoje zdobyte umiejętności pozwolą Ci efektywnie zarządzać projektami, tworzyć interfejsy graficzne i realizować innowacyjne rozwiązania, przyczyniając się do sukcesu w dynamicznym środowisku przemysłu

Guarantee
and certificate

If, after 14 days of purchase, you find that it is not for you, I will refund 100% of the course price. Upon completion of the course, you will receive a certificate in two languages - Polish and English.

Frequently asked questions

  • Will I receive a confirmation after my purchase?

    Yes, you receive an email. Sometimes emails end up in SPAM or other folders. Please check your mailbox carefully.

  • Is there a difference between the media on which the course can be ordered?

    No. The material is the same regardless of the type of storage medium. At the time of purchase, you decide which type of data carrier you choose, i.e. online or USB.

  • Jaki panel HMI wybrać na początku?

    Prosty z najważniejszymi funkcjonalnościami. Do podstawowych funkcjonalności będzie dobry KP300 lub KTP400.

  • Czy ten kurs jest dla mnie, jeżeli nigdy nie używałem HMI?

    Tak. Kursy podstawowe są właśnie przygotowane w taki sposób, aby osoby bez styczności z HMI firmy Siemens mogły nauczyć się takich umiejętności. Kursant jest prowadzony krok po kroku (co widać też w spisie treści kursu).

  • Can I deliver the course on different computers?

    Yes. The course material (videos) can be viewed on any computer.

  • What does the online version of the course look like?

    Dostęp do kurs otrzymują Państwo na maila, gdzie jest link do zalogowania na platformę e-learningowa.

  • What if a problem arises during the course?

    Please email me with a description of the problem at: biuro@plcspace.pl.

  • What is the access time for the course?

    Bez ograniczeń czasowych dla każdego nośnika (czyli wersji online lub USB).

  • Czy muszę mieć jakiekolwiek doświadczenie z projektowaniem HMI?

    No. The basic course gives step-by-step all the information needed from 'scratch'.

  • Will I need to purchase a licence for the Factory IO software?

    No. There is information in the course on how to obtain licences to complete the material.

  • Will I need to purchase a licence for the PLC development environment?

    No. There is information in the course on how to obtain licences to complete the material.

  • Is it possible to return the course?

    Yes.

  • Will I need a PLC to deliver the course?

    Nie. Sterownik rzeczywisty nie jest konieczny. Kurs jest przygotowany w taki sposób, że można go zrealizować także na sterowniku wirtualny (czyli PLCsim). Wszystko zależy od tego, czym dysponuje kursant.

  • How do I buy a course?

    Just click Add to basket and complete the form and make payment.

  • When does the course start?

    -> Online version - immediately after payment
    -> Physical version - when you receive the package from the carrier.

Buy as a set and save

Select at least 2 courses from the list and the first free book item (three selections in total) and an automatic discount of 25% will be calculated in your basket.

If you want to find out more about a particular course, click on its name and the page will take you to its offerings.

[ywfbt_form product_id=""].

Companies that have benefited from our courses

Feedback from students

Stanislaw

What sets this course apart is the opportunity to acquire practical, concrete knowledge. Everything is clearly explained. Definitely recommended!

Marcel

After going through the course, I know what the components of the programming environment are and what to do step by step. Now I feel confident and know what I am doing

Leon

Course delivered in a very accessible way. Contains a lot of interesting and useful information.

Michael

I can honestly recommend the course. It is solid and factual knowledge. I will definitely be buying more.

Victor

Thanks to the course, I have decided to go further in this direction. The goal is to look for a more challenging and better job

Peter

The course prepared by Mr Tomasz is distinguished by its high level of content and meticulously prepared lessons. They are planned in a clear and sensible manner, making it easier to assimilate knowledge and return to the material if necessary. An additional advantage is the possibility of a free consultation.

Nikodem

Definitely recommended! The facts themselves, no unnecessary dwelling on issues.

Ignatius

This is my first course, certainly not my last. I am impressed with the substantive quality of the knowledge.

Tymon

Everything clearly explained, you can really learn a lot. Lots of practical information and examples to help you remember everything. In my opinion, it is worth using this form of learning because you can learn anytime and anywhere. It is practical and convenient.

You may also be interested in:

Basic
TIA Portal
S7-1200F
LAD
V20

From: 249.00  / month

Intro
TIA Portal
S7-1200F
LAD
V20

Original price was: 99.00 zł.Current price is: 49.00 zł.

Intro
TIA Portal
S7-1200
LAD
V20

Original price was: 99.00 zł.Current price is: 49.00 zł.

Intro
TIA Portal
S7-1200
LAD
V20

Original price was: 99.00 zł.Current price is: 49.00 zł.

Select currency
Scroll to Top

Ask a question about the course

Become an HMI designer

Tomasz Gilewski
Hello, my name is Tomasz Gilewski. I am the founder of PLCspace, author of books on the S7-1200 controller and HMI panels (i.e. Siemens hardware). I have been programming exclusively on Siemens hardware and engineering tools for several years.
Why Siemens?
- My first project in 2007 was an intersection traffic light based on the LOGO! Programmable Logic Relay. While learning the fundamental principles of the hardware and interface, I noticed the simplicity, intuitiveness and speed of integration for various SIMATIC systems. I noticed deficiencies in the form of functionality when working on controllers from other manufacturers.
- It is well known that Siemens automation equipment is robust and durable. Proof of this can be found in the PLCs of the SIMATIC S5 family from the 1980s, which many factories are still using today. P
 
In my 14 years of work, I have learnt every checkbox and what it is used for.
 STEP5, STEP7, MicroWin, LogoSoft Comfort, Starter, WinCC flexible, TIA Portal were the most popular Siemens software. I have gained experience by taking
- participation as a programmer, or more like a software engineer, in around 50 application projects for industries such as food, construction, automotiv, texyl, among others.
- Some of these applications were prototypes.I had to adapt to constant changes in design assumptions , which is quite a difficult task for a programmer. Another challenge was
- implementation of multiple software modifications to already running applications, i.e. the need to analyse the programme code after another programmer.
- I have spent very many hours looking for solutions to problems, parameterisation of various functionalities
Education itself.
 
New versions of engineering tools, firmware and hardware are released periodically. To keep up to date, I participate
- in on-site training at Siemens and its distribution companies
(a) LOGO!
(b) basic and advanced training in SIMATIC S7-300
(c) basic and advanced training in SIMATIC S7-1200
(d) safety training with SIMATIC S7-1500F
(e) visualisation training
- in numerous on-site and online workshops organised by Siemens related to SIMATIC systems.
- reading manuals
Helping others
I have decided to help and share my knowledge and experience with others , especially with those who are taking their first steps in programming. I want to make it easier for them to get to know this world. That is why
- since 2014, I have been running a blog located at s7-scl.pl where I describe various interesting topics about SIMATIC systems
- in 2015, my first book on the basics of S7-1200 programming in SCL language was published
- In later years I wrote several other books on
a)S7-1200 programming in LAD language
b) visualisation on a SIMATIC HMI panel
Provision of classroom training
I am currently active within the PLCspace company, where, in addition to programming work for new applications or upgrades to existing applications, I am involved in providing classroom training in many cities in Poland (Warsaw, Gdansk, Poznan, Krakow) as well as directly at company headquarters for their employees. Training topics include:
a)programming of SIMATIC S5, S7 systems in any programming language
(b)visualisation, i.e. human-machine interface on HMI basic and comfort panels
(c)diagnostics, i.e. everything maintenance staff need to know to keep machines and lines working properly. If a fault occurs, you will find the cause of the downtime in the shortest possible time
(d) communications, where exercises take place to exchange data over the various communication network standards used in industry
e) safety, which translates as machine and process safety. This training covers the most important standards a programmer should know, as well as the configuration of fail-safe hardware and the exercise of safety functions for handling components (e.g. Safety Mushroom).
f)drive engineering where exercises on parameterisation of frequency converters for motor control are conducted
Training is based on Factory IO
- actual mini lines and have several levels of sophistication.
Video courses
I am the author of several video training courses on:
- s5, s7-300/400 s7-1200/1500 controller programming
- visualisation for the Basic and Comfort panels
- diagnosis of classic systems such as the s7-300/400 and new systems such as the s7-1200/1500
- communication based on the new s7-1200/1500 controllers
- safety using SIMATIC S7-1200F
- Drive technology based on MICROMASTER and SIMATIC V20 frequency converters

TIA Portal software

Totally integrated automation is a development environment that combines PLC (programming), HMI(visualisation) and startdrive(drive technology).

The software comes in two versions:
 
  • basic -> allows programming of S7-1200 family PLCs
  • professional -> allows programming of all CPUs supported by the development environment
It is the successor to the SIMATIC Manager package, which has been well-known since the 1990s.
This allows you to effectively and efficiently create designs for control systems in industrial applications. Key features include:
  • drag & drop functionality for symbols, variables, devices
  • readability and intuitiveness of editors
  • intelligent interface for the automation programmer
  • common symbology and data for each device in the project
  • online diagnostics and testing
It is an intuitive programme, easy to learn and trivial to use while working. It provides the highest level of productivity for the engineer. The TIA Portal tool has been developed by Siemens thanks to its many years of experience in designing industrial automation softwares.

CPU S7-1200

The new controller, which has been developed as a successor to the S7-200, is characterised by slightly weaker parameters than the S7-300 family. Several CPU versions present in the family allow selection according to project requirements.

Key benefits:

  • modular construction The CPU can be expanded with additional I/O, communication and technology modules

  • built-in technological functionsoptimised for regulation, weighing, high-speed counters, telemetry, identification
  • modern programming with new functionalities communication integrated PROFINET (also PROFIsafe version F) and Modbus TCP-IP, PROFIBUS processors, serial (RS232, RS422/485)
  • data security access protection, copy protection, access levels
  • built-in diagnostics diagnostic messages displayed on the TIA Portal, the embedded Web server, the SIMATIC application and the HMI
  • Customer benefits - Proven in many industrial applications- Long-term availability and compatibility- Prepared for use in harsh environments- Modular, easily expandable, scalable
  • Scope of application - Control using central and distributed I/O - Technological tasks

The SIMATIC S7-1200 is a modular microsystem for low and medium performance applications. The central processing unit (CPU) contains the operating system and the user program. The user programme is located in load memory and is immune to power failure. The execution-relevant parts of the user programme in working memory with fast access are processed. The user programme can be transferred to the CPU using a memory card (MC) - as an alternative to transfer via an online connection to the PG programmer. The memory card can also be used as external loading memory or for software (firmware) updates. Connections to the process (object signals) are realised by on-board (built-in) inputs and outputs, the number of which depends on the processor version (the higher the model the more of them there are). The on-board inputs and outputs are specifically designed to support integrated high-speed counters (HSC). The operating system (firmware) additionally includes pulse-width modulated output pulse generators, as well as technology objects for controlling stepper motors. Expansion of the central unit can be realised by means of:

  • signal boards (SB) can be used to extend the built-in inputs and outputs.
  • signal modules (SM), these are available in digital and analogue signal versions.

Factory IO

Typical machine scenarios can be run in Factory IO, and the virtual factory connects to the SIM PLC simulator (or the actual PLC. Programming of the controller is possible in the programming environment (depending on the PLC family), and insight into its operation is available during the online connection

The general idea is to collect input data from the machine via the Factory IO program, which is then sent to the PLC. The program in the PLC is then executed and the results (output states) are sent back to Factory IO, which allows actuators(e.g. motors, actuators) to be started. The entire process is monitored in real time by you, allowing you to visualise how well the machine is performing.

  • Factory IO by Real Games is a useful tool for learning PLC programming through factory simulations. It is ideal for participants of the Siemens S7-1200 PLC programming course, as it allows them to practise their skills in a safe environment.
  • With Factory IO, it is possible to simulate various scenarios related to production processes, such as an assembly line, a transport line and many others. The tool also allows the visualisation of the operation of industrial machines and equipment, making it easier to understand the processes taking place in the factory.
  • During the Siemens PLC programming course, participants will have the opportunity to use Factory IO to consolidate their PLC programming knowledge and skills. Through simulations, the trainee will be able to practically apply their knowledge, test different scenarios and solve problems, allowing for more effective and practical teaching.
  • Using Factory IO during a Siemens PLC programming course is an ideal way to develop skills in a safe simulation environment, which will prepare participants to put their knowledge into practice in real industrial projects.

Search on