We will now take a first look at PLC programming, focusing on the virtual controller, the PLC SIM program. Here we will carry out the programming of the previously prepared default hardware configuration and an empty program. Currently there is no code in it yet - we will deal with this later.
Launching the simulator
Now, we need to start up our virtual controller. Compared to the real controller, where you have to connect the power supply, here, in the case of the SIM virtual PLC, you simply have to start it up.
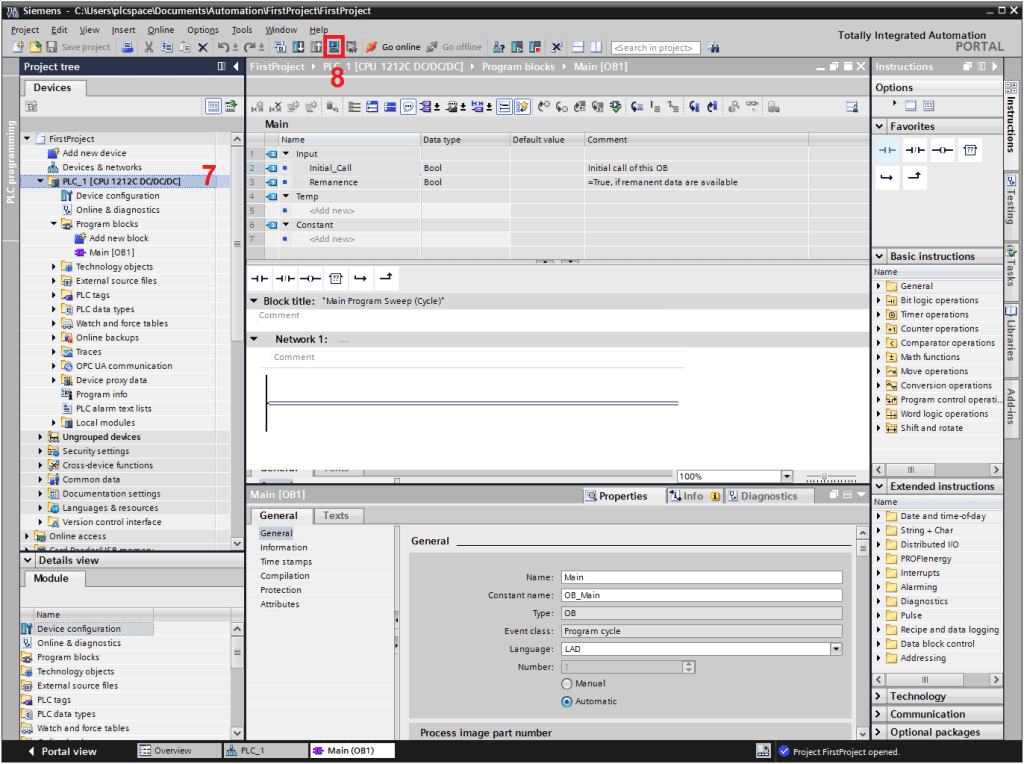
We see the next two steps: selecting in the project tree that we want to start the virtual driver, and going to the section marked with a red box, where we click on the icon resembling a blue TV, which results in the virtual driver being turned on. Tia Portal is configured in such a way that enabling this driver is simultaneous with performing a download, i.e. uploading all the data from the project to this device.
Permission to simulate
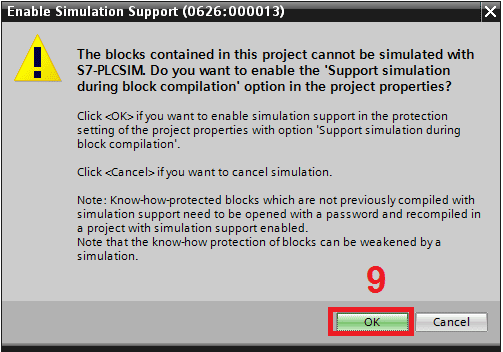
We also have simulation permission beforehand - this is key. The project must include a suitable PLC (S7-1200 with firmware at least v4.0) and the simulation permission ticked, which is one of the steps of the
These are the steps we need to follow to initialise the simulation on the virtual PLC.
Deactivation of interfaces
Przechodząc dalej, pamiętajmy, że pracujemy albo na sterowniku rzeczywistym, albo na sterowniku wirtualnym. Nie możemy korzystać z obu jednocześnie, o czym informuje nasze okno pop-up z opcjami 'Enable Simulation Support’
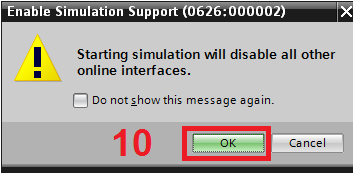
. Musimy się na to zgodzić – to jest nasz dziesiąty krok. Klikamy na przycisk 'OK’, akceptując tym samym, że wszystkie inne interfejsy w naszym komputerze będą niedostępne w tej chwili, gdy pracujemy z wirtualnym sterownikiem.
Download
Jeśli już mamy zgodę na pracę z wirtualnym sterownikiem, pojawia się kolejne okno z opcją 'Load Preview’, podsumowujące, co zostanie wgrane do naszego sterownika. To obejmuje również uruchomienie samego sterownika wirtualnego.
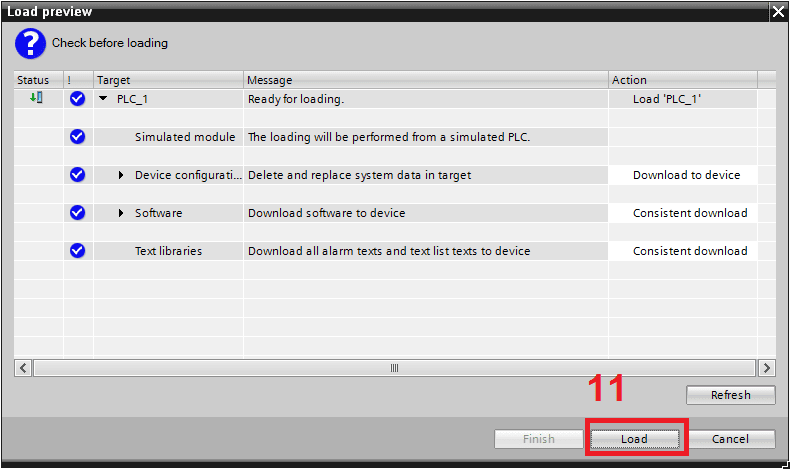
Widzimy opis poszczególnych elementów, takich jak dioda rajstop, informująca nas, czy sterownik pracuje i wykonuje program. Jeżeli dioda jest pomarańczowa, to oznacza, że nie wykonuje żadnych działań. Dodatkowo, mamy kolumnę ze zbiorczym stanem błędów oraz przyciski umożliwiające zatrzymanie lub wznowienie wykonania programu. Cała procedura uruchomienia programu rozpoczyna się po wcześniejszym naciśnięciu niebieskiego telewizora, który wcześniej zaznaczyliśmy. W oknie 'Load Preview’ klikamy 'Load’, a wcześniej możemy zapoznać się z informacjami pojawiającymi się w kolumnach 'Target’ i Message’. Po tym kroku procedura wgrania zakończyła się.
PLC commissioning
Punkt dwunasty to decyzja o uruchomieniu sterownika, gdzie musimy wybrać opcję 'Start Module’, ponieważ domyślnie jest ustawione na 'No Action’.
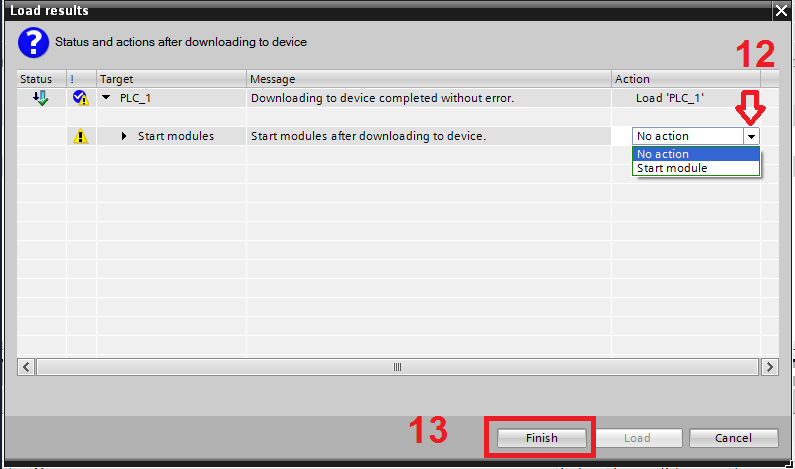
Oznacza to, że wszystko zostanie wgrane do sterownika, ale sam sterownik pozostanie w trybie RUN, czyli nie będzie wykonywał naszego programu. Pamiętajmy, aby zmienić to ustawienie, klikając czarny trójkąt, jak wskazuje czerwona strzałka, i wybierając opcję 'Start Module’ z listy. Następnie klikamy przycisk oznaczony jako punkt trzynasty, czyli 'Finish’, aby zakończyć procedurę wgrywania.
Virtual PLC
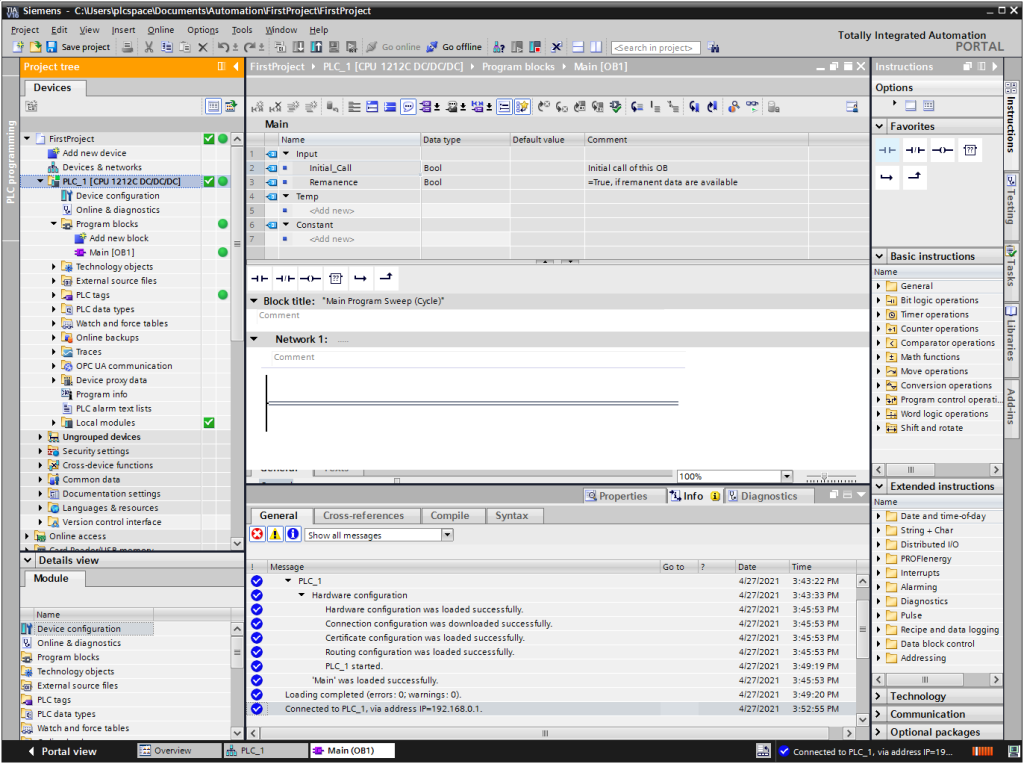
Po tej operacji sterownik przechodzi do trybu RUN, co potwierdza zielona ikona (wirtualna dioda) przy napisie 'Run/Stop’ na zdjęciu sterownika.

In this way, our virtual driver is configured with the previously prepared programme code.
Switching to online
The next step, as point fourteen, is to go online, i.e. to view the current state of the controller. In this mode, we can observe the operation of the program code and analyse the memory contents. This is important because once a programme has been written, it often needs tweaking, and this is best done by observing the current operation of the logic.

Aby przejść do trybu online, musimy ponownie zaznaczyć sterownik w drzewie projektu, co jest krokiem piętnastym, oraz skorzystać z opcji 'Online’, oznaczonej numerem szesnastym w pasku ikon. Po upewnieniu się, że wirtualny sterownik jest włączony, możemy połączyć się z nim online.
Online preview
This will result in a view where the orange elements indicate that the controller is connected.
The highlighted balls in the project tree indicate that the programme section is ready for interaction. It is worth mentioning that the green colour indicates that the program section in the controller is working correctly. If you see anything other than a green circle, as we see with the currently marked plc_one driver, which is now marked in blue with a white bird in a green square, it means that the status of that device is OK. This is the kind of summary that tells us that everything is OK with a particular device.
Disconnection from the PLC (OFFLINE)
We are now online with this driver, but in some situations it may be necessary to return to the offline mode we were in before the online connection.

In order to go back to offline mode, we have to follow the steps as described in point sixteen. We select the driver, which is necessary because, when performing different operations in the project, we click in different places. If we want to perform the step of going offline, disconnecting from the driver, then we have to first select the driver, which is step sixteen, and then use the icon numbered seventeen. That's the whole procedure, which is to click the appropriate buttons.
View after disconnection from PLC (OFFLINE)
After this step, we see the view of the project after disconnection,
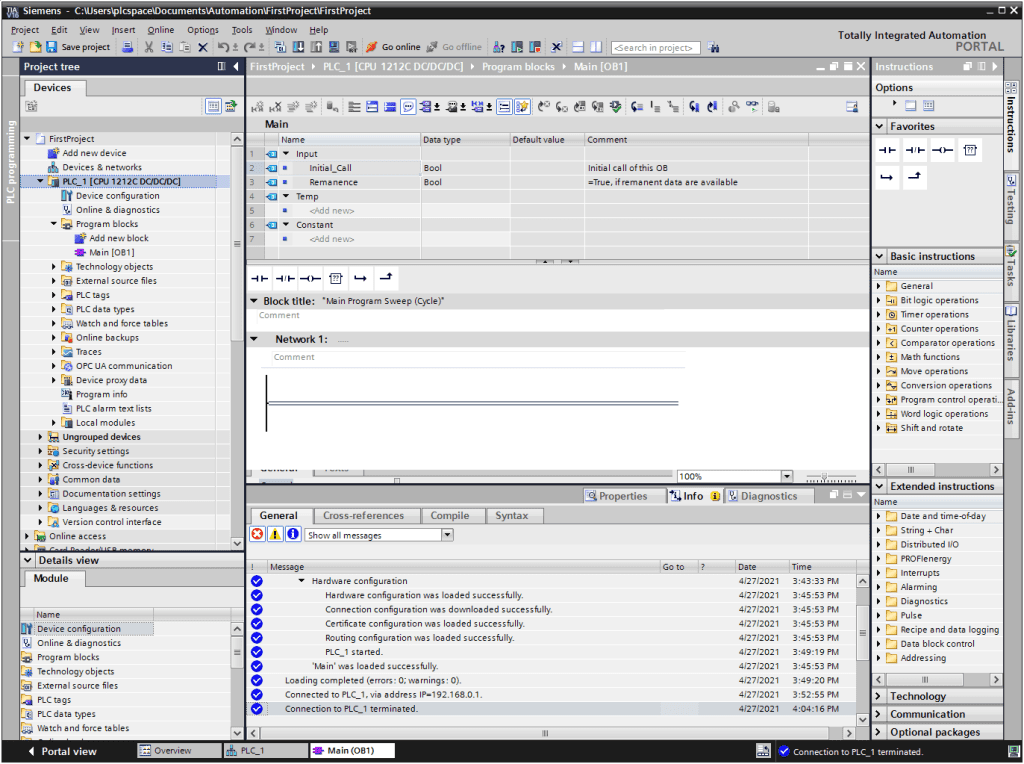
That is, we are back to a situation where we are only in the project with no connection to the actual controller
Project record
Saving the project in Tia Portal is also an important step in working with the project. The development environment runs on the computer and sometimes crashes occur. It is therefore a good idea to get into the habit of saving your project regularly.
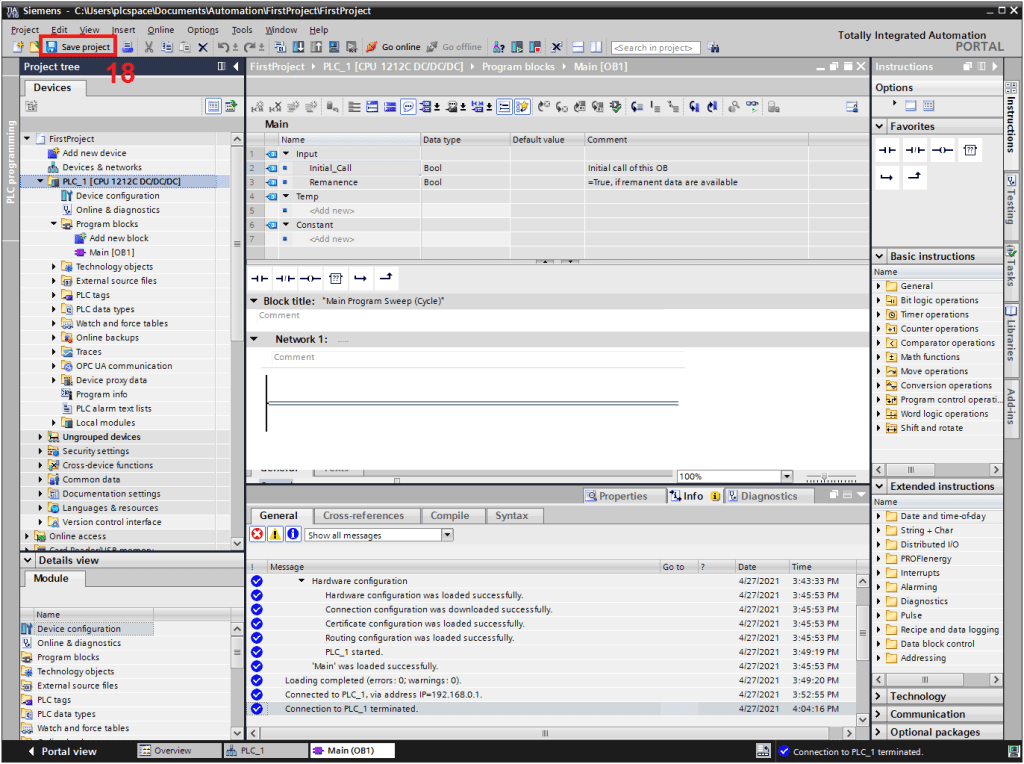
I would suggest that you always save your project before uploading it to the controller, i.e. before the download procedure. This is important because once you save your project you can be sure that you will not lose the progress of your work. It is important to remember that unfortunately the Ctrl+Z (undo) shortcut does not work in Tia Portal, so saving the project status is a key practice to focus on when working with the project and the driver.